CAA Manual
Manual filing on e-file v2
Environment
- Select your environment:
Production environment : https://www.e-file.lu/e-file/
Homologation environment (Test) : https://homologation.e-file.lu/e-file/
Login
- Enter your e-file login credentials (user name and password) and click on the Access button.
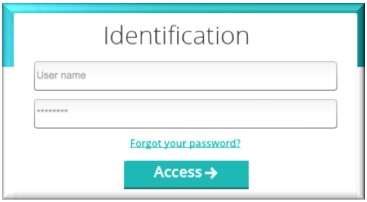
IMPORTANT: If you do not have an e-file user account or if you do not remember your password, you might contact your e-file administrator of your company.
Filing of reports initiated by CAA source files
The following reports are initiated by CAA source files:
CPR - Compte rendu
RAC - Rapport actuariel
RDI - Rapport distinct du réviseur
RGO - Rapport de gouvernance
RLB - Rapport LBCFT
RRE - Rapports sur le traitement des réclamations
ESP - Enquête spécifique
ETR - Etat trimestriel
RSO - Rapport distinct Solvabilité 2 du réviseur
FIR - Fiche de renseignement
Retrieve source files
Step 1: Click on the Document management icon
![]()
Result: the Transmission follow-up screen of the Document management opens
IMPORTANT: if the Document management icon is not available on your screen, you might contact your e-file administrator of your company, who will add the CAA - group to your e-file account.
Step 2: Select the Transmission period (From...To) and click on the Search button

Result: all files are displayed
Step 3: Click on the Plus iconat the right end of the row

Result: a pop-up window opens displaying the Detail of sending:

Step 4: Click on the View iconat the right end of the row

Result: the EfileCrypto.jnlp file is generated:

IMPORTANT: This file has to be downloaded and must be opened to start the encryption module
Step 5: Click on the Open button of the EfileCrypto.jnlp file

Result: the Encryption module opens
Step 6: Select the General tab of the Encryption module, enter your keystore password and click on the download button
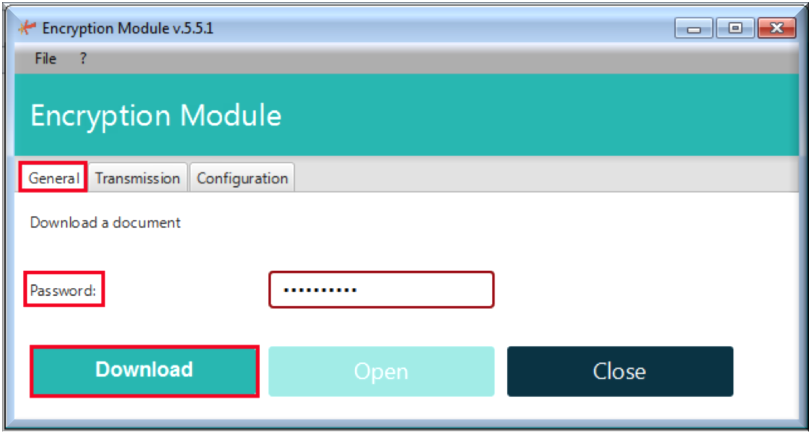
Result: the source file will be downloaded.
IMPORTANT: if the encryption module takes too much time to be opened or if the file EfileCrpyto has not been executed, the following message will pop up and you will have to click one more time on the View button.

IMPORTANT: If it is the first time you are using the encryption module, you may be asked for the keystore location in the Configuration tab.
The keystore file (file with the extension .ks) contains your Luxtrust certificate and is protected with a password. If you do not have the keystore or its password, please contact your e-file administrator.
Step 7: Complete the source file and rename it as indicated in the CAA - File naming convention document
Submit replies
Step 8: Tick the box at the end of the row of your source file report, click on the Select Action button and select Reply

Result: The EfileCrypto.jnlp file is generated. This file has to be downloaded and must be opened to start the encryption module
Step 9: Click on the Open button of the EfileCrypto.jnlp file

Result: the Encryption module opens
Step 10:
-Select the General tab of the Encryption module
-Enter the title of the Sending
-Upload your completed and renamed file (original source file) via the Upload button or drag and drop your file into the middle of the pop-up window (=>Drag & drop files here)
-Enter your keystore password
-Ensure that the control status light is green
-Click the Send button
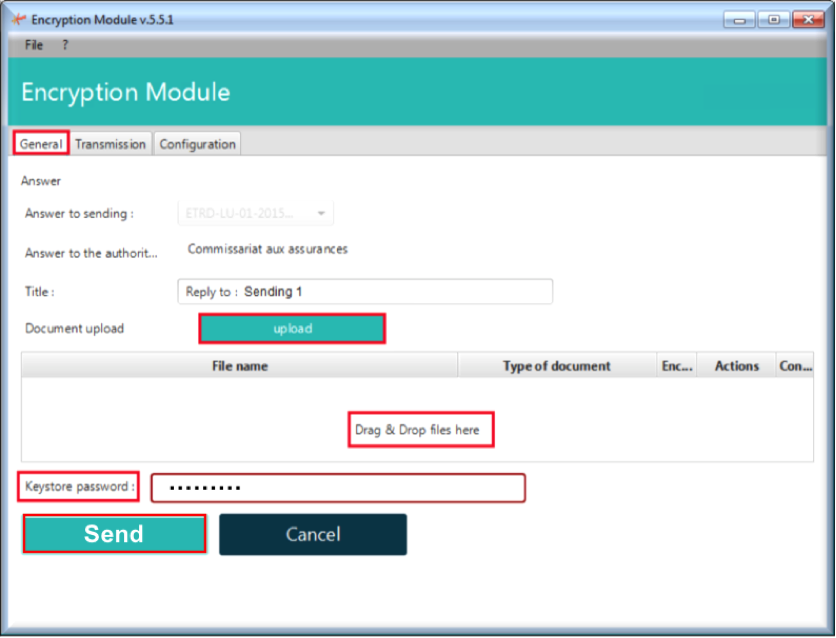
Important: the ecryption module checks if the file name is correct or not, as the file name of your reply must contain CAA instead of SRC (original file). If it is correct, the control status light will become green.
Retrieve feedback files
Step 11: Open the Transmission follow-up screen in Document Management and click on the Plus iconin order to view the feedback files you received

Result: a pop-up windows opens displaying the Detail of sending:

Step 12: Click on the View iconin order to view or download your feedback files (Cf. chapter 1.3.1 steps 4-6)
Filing of XBRL Solvency II reports and Narrative reports (no source files)
IMPORTANT:THESE REPORTS ARE NOT INITIATED BY SOURCE FILES
XBRL reporting Solvency II:
S01-Annual Solvency II reporting Solo
S02-Quarterly Solvency II reporting Solo
S03-Day 1 Solvency II reporting Solo
S04-Annual Solvency II reporting Group
S05-Quarterly Solvency II reporting Group
S06-Day 1 Solvency II reporting Group
S07-Annual Solvency II reporting 3rd country branches
S08-Quarterly Solvency II reporting 3rd country branches
S09-Day 1 Solvency II reporting 3rd country branches
S10Annual Financial Stability reporting Solo
S11-Quarterly Financial Stability reporting Solo
S12- Annual Financial Stability reporting Group
S13- Quarterly Financial Stability reporting Group
S14-Financial Stability 3rd country branches Individual Annual
S15-Financial Stability 3rd country branchesIndividual Quarterly
S16-Annual ECBreporting Solo (SII reporting with ECB-addon)
S17-Quarterly ECBreporting Solo (SII reporting with ECB-addon)
S18-Annual ECB reporting 3rd country branches (3CBwith ECB-addon)
S19-Quarterly ECB reporting 3rd country branches(3CBwith ECB-addon)
S20-Annual reporting Special Purpose Vehicles
S23-Ad-hoc reporting
Rapports narratifs:
N01- Rapport de révision
N02- Rapport de gestion du Conseil
N03- Procès-verbal de l’AGO
N04- Rapport actuariel (partie narrative)
N05- Rapport distinct (partie narrative)
N06- Rapport distinct Solvabilité II (partie narrative)
N07- Own risk and solvency assessment (ORSA)
N08- First Regular supervisory report (RSR)
N09- Solvency and financial condition report (SFCR)
N10- Organigramme
Submit files
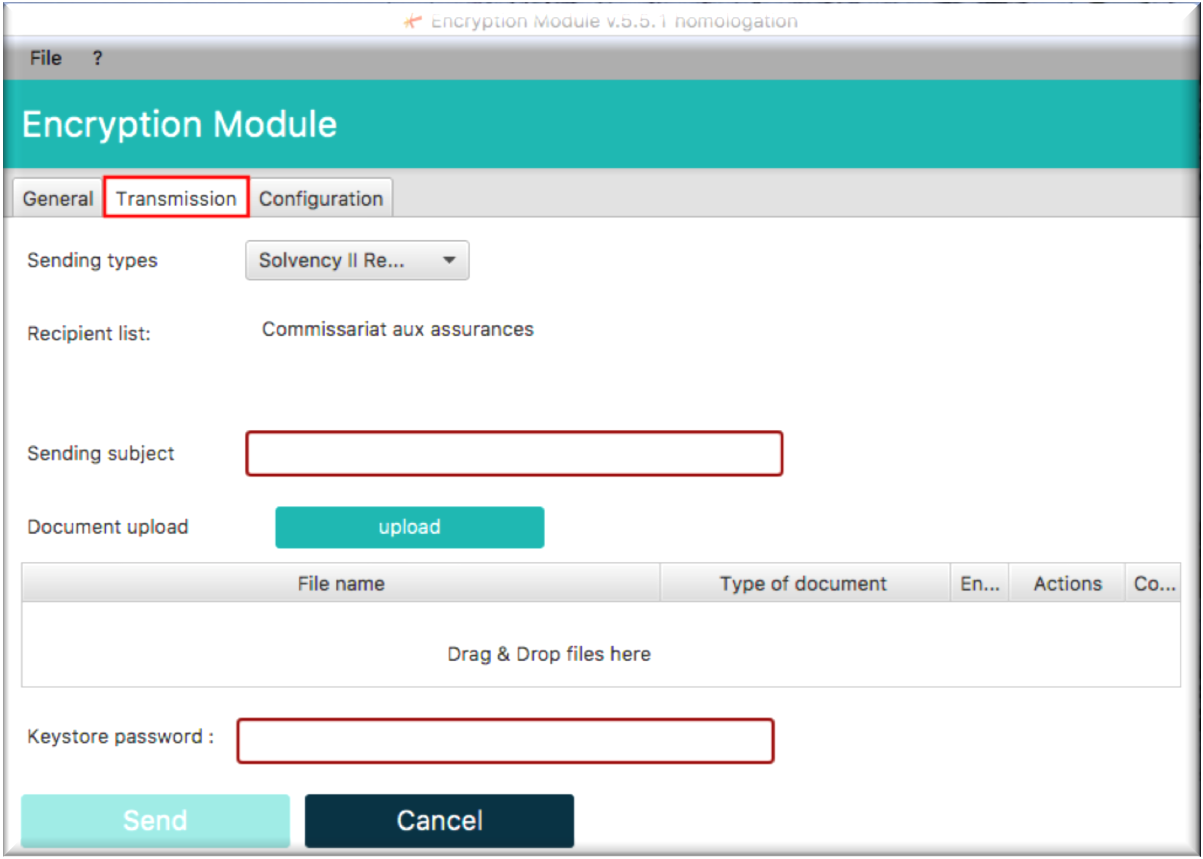
Step 1: Click on the Encryption Module icon

Result: The encryption module opens:
Step 2:
-Select the Transmission tab of the Encryption module
-Enter the Sending subject
-Click the Upload button and upload your file or drag & drop your file in the middle of the window
-Enter your Keystore password
-Ensure that the control status light is green
-Click the Send button
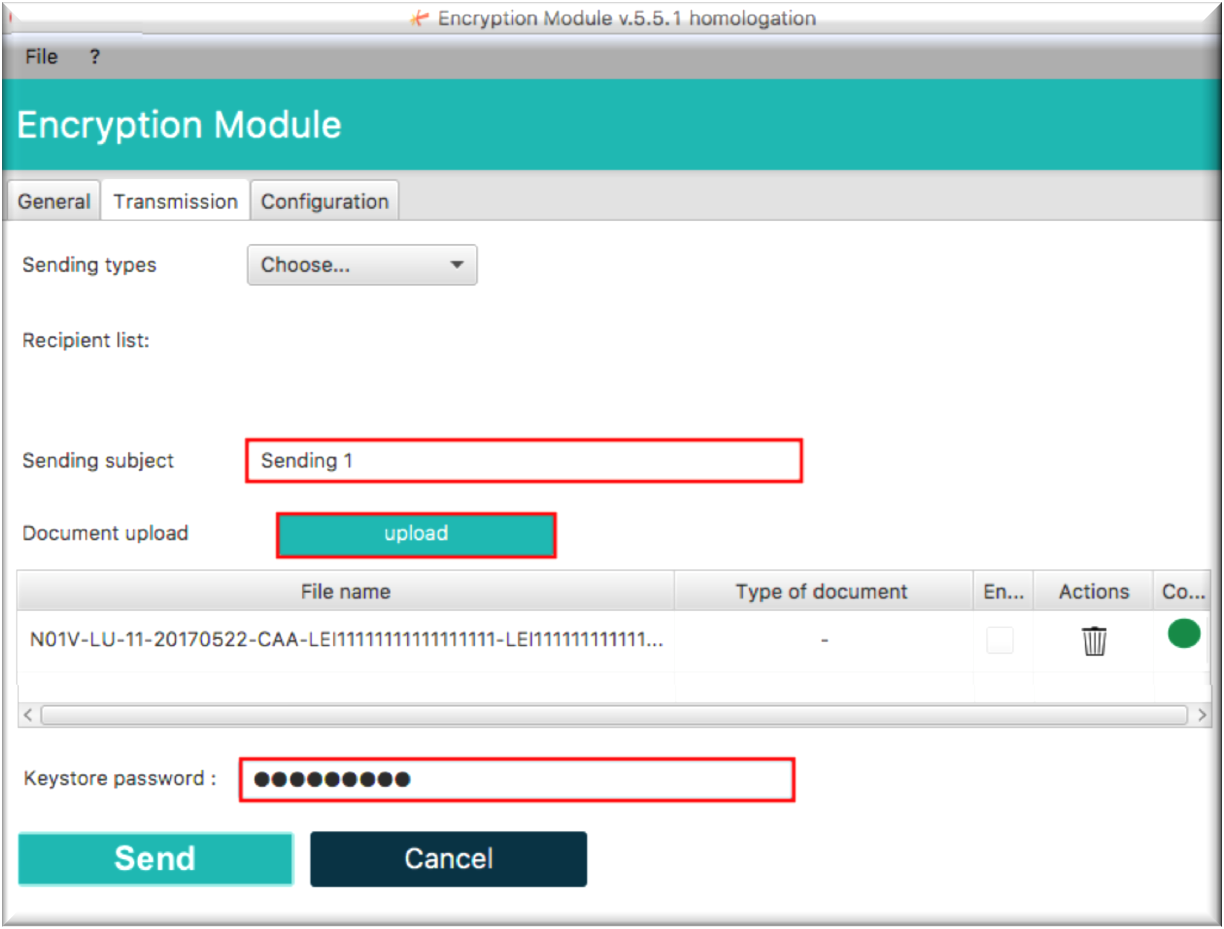
Result: The control status light becomes green and the file can be transmitted to the CAA
Retrieve feedback files
Cf. chapter 1.3.3 steps 11-12)
Automatic filing through the Sending Service
The Sending Service is Fundsquare's solution for automatically sending reports and documents to the authorities.
With a suitable network mapping, users can then simply copy the file to be sent in the appropriate directory.
The file is then automatically encrypted and sent.
- Please click the links below should you need further information on the Sending Service:
Sending Service Installation Procedure
Sending Service Update Procedure
Wiki-Sending Service
